Tales from.. ..The StrapLab!

TVvoodoo

Groupie
TGF Recording Artist
Vendor
Messages
79
I'm a Leather guy and make guitar straps. You *may* want one someday if you see 'em. So take that into consideration.

I'm new here, so I went over the TGF rules, didn't seem to be anything against it, but I figured I'd ask before being
outted as an evil capitalistic spam-spewer. Iron1's recent "Five Crosses" strap was born on my bench.

But I do wish to convey I am also a guitar gear brother, crappy songwriter, and pretty non-serious musician too,
As well, I have customized a good number of guitars with some pretty non-standard finish treatments.
If allowed to post my work, I promise to keep myself mostly to myself on one thread, but I can say some in the
past have found my long-running shop threads somewhat entertaining and edumicational.
Maybe my work might be more preferred in the "Ask Me Anything" section. Let me know.!

For example, here is a padded floating pad strap I made out of baby leopard patterned hair-on cowhide.
Some might say, "Slow down, Brad! Too. Damn. Far. Nobody's done anything that before, that's crazy!"
I think it works pretty ok.

PEMYH92k_o.jpg
 
@DrewJD82 thank you! Thank you for official affirmation. I promise to play nice.

Here's a peek at what's on my bench right now... I don't tool heavy leather straps every day but they tend to be larger productions when I do.

I find many are fascinated by the process, mostly because this type of work is pretty specialized and becoming rarer nowadays in our factory press mass-produced reality. It bugs me like crazy when Big Strap advertises "hand tooled" works that were obviously (to me) just run under a weighted embossing wheel, or mass-stamped via some hydraulic or pneumatic press. No soul, just fast $$.

Started this one a few days ago... Mo from The Porch Pirates wanted a tooled leather custom reflecting his stage persona... looking for a heavy metal Biker-meets-Pirate theme so... I started with some proper heavy 9 Oz. Vegtan cowhide! Stamped in his alias...

gY1aSUCj_o.jpg


Did a bunch of beveling and backgrounding... cowboy letters pass not too bad for ornate pirate. Badass is badass, amirite?

eC7ioK74_o.jpg


Double-dyed 'er all black... then banged in a bunch of tin, grommets, rivets... Flat smashed the gunmetal rivets because to me it gives an old world feel... and they end up like dark glittery little mirrors. Chose gunmetal because I felt nickel would distract from the name lettering too much and be a little too J. Priesty rather than than more piratey

Added a big heavy relic buckle from my stash on the back end for adjustment.

3bmtiyVe_o.jpg


Still picking away at it in between loads of laundry today... Yeah, I'm a good helper! ... The letters and sabres were painted yesterday

vV6sEIjm_o.jpg


his aesthetic... what better than a jolly roger with crossed sabres a winged skull? You saw it here first LOL!

UR4ctoG8_o.jpg


Last night I got a clearcoat on all the silver painted bits, one more early this morning. I do this to protect the silver coating from my homegrown burnishing vice. Important to not get clearcoat on the edges, before edge burnishing, as this inhibits the ability to do it proper.

Here it'S inside my jig... nice long clampin' jaws (padded so to not damage the work) hold it steady and secure so I can go to work on 'er

mswhe2qv_o.jpg


Some leatherworkers get outright obsessive about fine edgework - I do like a nice edge but I think it's a bit more important for things like watchbands or wallets and such. I do pretty ok with mine. Each leathersmith seems to have their own process. There's various edgework helper products out there, like gums, tokonole etc... I find distilled water with a secret powdered ingredient dissolved works best for me.

First I run down the edges with a wetted sponge a couple of times, and wait for a minute or two for it to be absorbed by the leather fibers. Then one more wipe with a damp sponge and I go to work with the leather side of my burnishing block. I don't know exactly why, but a similar leather always burnishes leather edges real nice.

BWqFYsWh_o.jpg


There are various rotating devices that go into dremels, whatnot... I've tried to do it mechanically, but didn't seem to have much luck. What works best for me is plain old fashioned elbow grease! Heat & friction and the right angle long enough, hard enough, and soon those fibers sit down nice and tight. The edges slowly smooth out and begin to get a bit of a gloss to 'em. Then, I turn over my tool and continue with the cotton web canvas grooved side to polish. It's seen plenty of feet of leather edge!

FSZF4Zal_o.jpg


Keep at it, maybe add a tad more moisture if needed, and it will eventually develop a nice shine. It's definitely something you get a feel for after doing it for a while. It's important to have the moisture right, and to make sure your edges don't flop, and keep steady while you are rubbing. Some real work involved here! Burnishing an average approx 11.5 feet of the edges of a vegtan strap edge can give me about an hour's worth of upper body of exercise

Here's a pic of the underside of the back end of the strap. Leather lacing not only decorative but will also be functional to hold the extra unused strap end tight to the strap. Inside I want to make sure the buckle remains very secure with two rivets AND a pair of Chicago barrel screws. The lacing is glued inside as well, plus clamped tight with a couple of staples. Before I sew the lining on, I'll cover this all up some protection, so it won't be annoying to the wearer, or wear through the lining.

33d0sznn_o.jpg


Most sub $100 category straps you find will be rough, cut-off leather on the sides. A burnished edge looks more elegant and won't be abrade on your neck too bad. Particularly important in 3" wide heavy leather like this. Here's an unfinished edge vs one burnished lovingly to a shine.

yhPtE48Z_o.jpg


Once I get the edges to where I am happy, I get a coat of clear on them to hold 'em, and at this point I can also do a final buff, and begin putting protective finish on the rest of the strap to lock down the dye. Here she's coming along after 2 coats this morning. I'll probably get three more on before noon tomorrow, then I'll be able to add a few extra studs in the middle of the top where needed, line it, pad it in the 'almost famous' Well-Hung way, then sew it all together.

HSgVP1qE_o.jpg

It's an interesting and unique design, and coming together pretty nice! Yo ho ho and a bottle 'o ...Jack!
 
Last edited:
Well… that’s entirely too awesome. Gonna have to ask you to suck so as not to trigger my BLC (born loser complex).


Seriously, I’m just blown away every time I see your work. Thanks for sharing! Hopefully everyone on TGF gets to own one of your amazing creations.
 
I'm ready to order a strap from you! Should I PM you? Is there a website as Alex has queried? Let me know what details/spec you need and how you would like them delivered (PM, email, etc.)!! Great work, thanks for sharing!!!
 
I do have a store... but I try not to mention it too much. Turns some folks off ...but lets just say I'm here if you need me. I joined TGF more for community than commerce. I'm a member of several guitar forums but I'm digging the casual, less "autocratic" style of this place. Some other places seem to be slowly turning into stale echo chambers.

My brand is called
Well-Hung Guitar Accessories
No actual website, only a humble Reverb storefront. Also can deal direct because some people are reverb adverse.

My niche is wider, longer padded comfort straps, not always leather but usually pretty different than what the stores offer. Custom work, replica work. Strap repairs. Stage and tour duty quality. I've also developed my own design strap button which I believe kills locking mechanical gadgetry dead. I believe I'm the only dude still making them "old school" leather strap locks (foldovers) that many guitarists my age and a little older still remember fondly.
 
Last edited:
Hello again all my strap-interested friendlies!

A couple new things on my inventory wall after today.
Fresh new memory-foam padded Genocide series strap called "Tarnished Reputation" This is skull embossed leather, dyed black, then lightly rubbed with silver and clearcoated.
I make a ribbon out of it then run it down a 3" wide padded leather base.

I've used this skull leather before, lots of different colour combos, but silver is most popular.

6EfKDY53_o.jpg


And something that would probably look pretty fine on Brad Gillis's shoulder with his red/black strat affair, if he were still with us... "Scarlet Fever!"

3" wide black leather base, with the rolled edges, like the one above too. This means no sharp cutoff n the sides to bother your neck. On top of the leather i sewed this 1.5" strip of fire engine red "vegan" (fake) leather, with a bunch of fun concho type cowboy bling in nickel plate on it. Pretty striking.

On these ladder adjusting style straps, the body leather is soft and pliable, usually garment or upholstery leather. For the nose and tail the leather I use tougher and thicker stuff for trustiness and longevity. Or, two layers of medium weight leather glued and sewn to make one nice strong piece.

pCFNAoAt_o.jpg


Y'know, I was thinking the other day about how I'm creeping up real close on 1,000 feedbacks over that "R" platform. This exciting, for me... like watching the old odometer roll over LOL!

Gonnna happen sometime in the next couple of weeks probably. This is something I am ready to celebrate! I know I have a single 4-star review in there somewhere, but when I hit 1001, meaning 1,000 ⭐⭐⭐⭐⭐ 5- STAR feedbacks ⭐⭐⭐⭐⭐ then I'm probably gonna totally flip out!

CFCW3TIr_o.jpg


In fact, let me offer this: if the 1,000th five star Well-Hung feedbacker (1,001) happens to be a member of this forum, let me know. 'Cause I'm gonna do something real special for you, and that's a promise! Maybe you can have a shot me treatin' you extra right if you're a gamblin' man, and it all lines up in your favor.
 
Last edited:
I'm a Leather guy and make guitar straps. You *may* want one someday if you see 'em. So take that into consideration.

I'm new here, so I went over the TGF rules, didn't seem to be anything against it, but I figured I'd ask before being
outted as an evil capitalistic spam-spewer. Iron1's recent "Five Crosses" strap was born on my bench.

But I do wish to convey I am also a guitar gear brother, crappy songwriter, and pretty non-serious musician too,
As well, I have customized a good number of guitars with some pretty non-standard finish treatments.
If allowed to post my work, I promise to keep myself mostly to myself on one thread, but I can say some in the
past have found my long-running shop threads somewhat entertaining and edumicational.
Maybe my work might be more preferred in the "Ask Me Anything" section. Let me know.!

For example, here is a padded floating pad strap I made out of baby leopard patterned hair-on cowhide.
Some might say, "Slow down, Brad! Too. Damn. Far. Nobody's done anything that before, that's crazy!"
I think it works pretty ok.

PEMYH92k_o.jpg
Not to detract from the straps, but can you tell us a bit more about that tele?!?!?! :love:love:love
 
@Boudoir Guitar thank you for showing interest in the "Paisley Royale..." I admit I posted that thing for a little bit of guitary "shock value" but nobody took the bait :pee

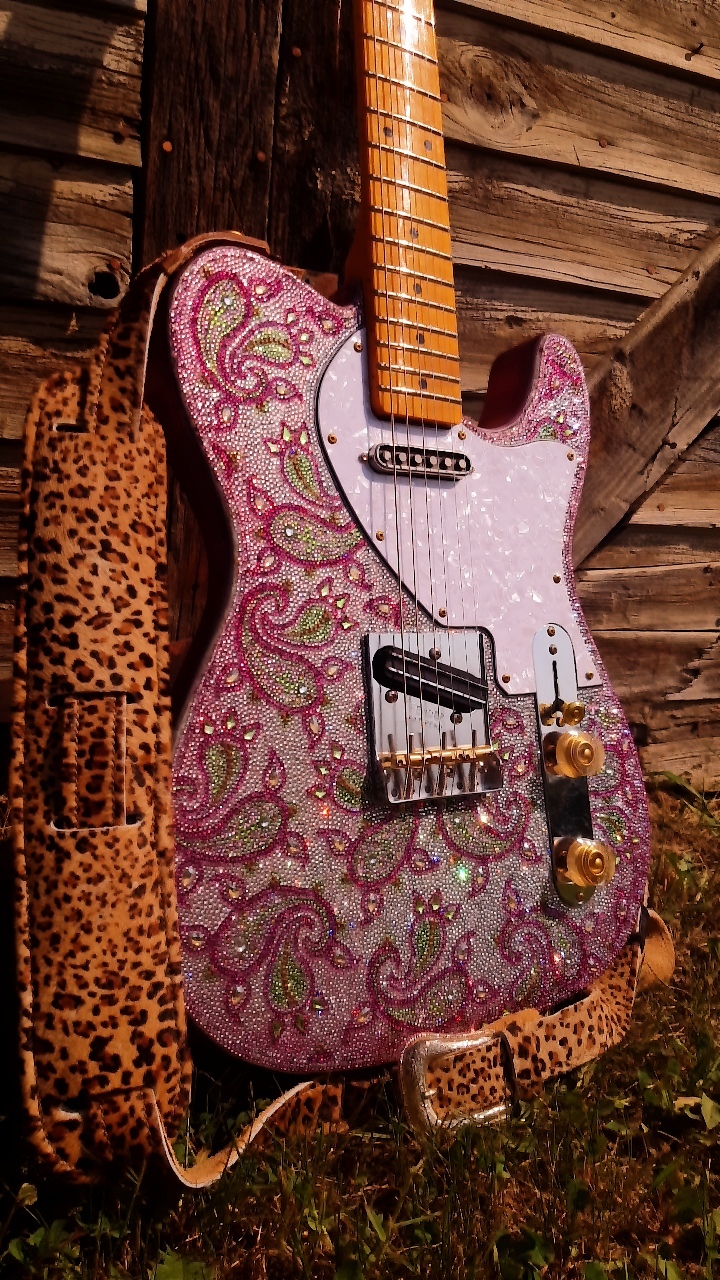
It all started fall 2018 when I decided I needed to create a new kind of paisley tele. At the same time I was also gassing for a sparkle/flake guitar so I decided why not attempt to create the most outrageous pink paisley ever seen by human eyes?

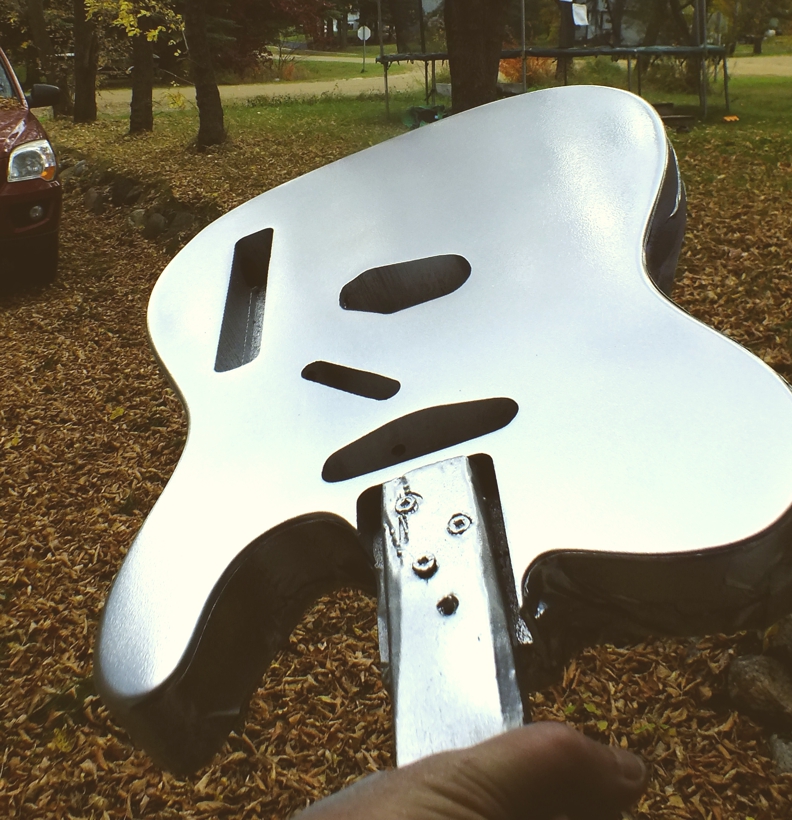
I started with a regular Allparts alder body, sealed it and painted typical rattlecan silver.

EmS1rtwI_o.jpg


Then I took almost a year trying to figure out how to make this stupid sparkle paisley, without watersides or a flake gun like I've seen done before. There were various test attempts at using sparkle glue which were horrible fails. Then I lit on the idea of using crystal gems. Once I got them in, figuring out how to make the pattern, how to secure them to the body, and even just plain handling these miniature gems were all serious problems that needed solving.

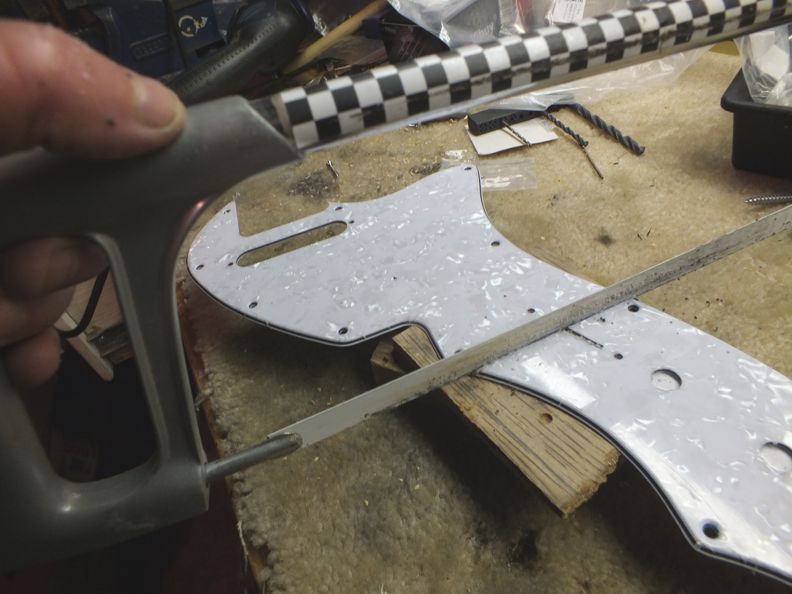
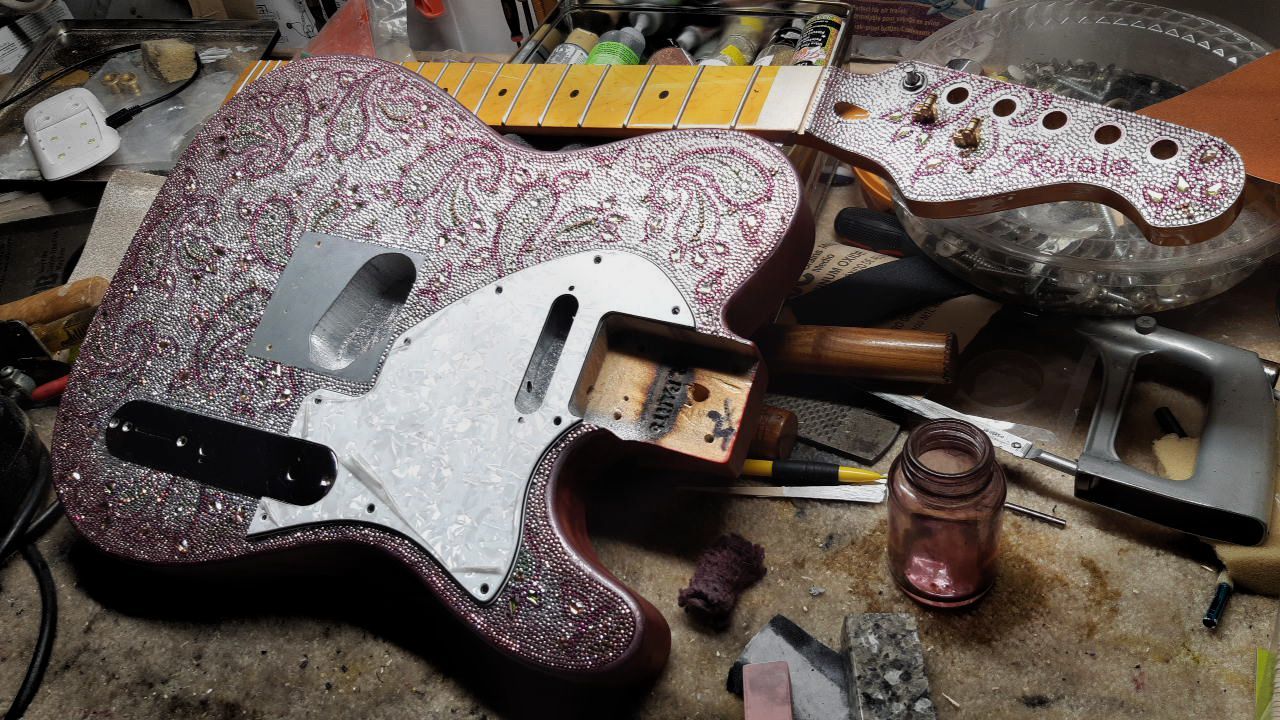
In the meantime, I got in a thinline style pearloid guard and modded it accordingly to the final unique hybrid look I was shooting for.

QfpJo9NI_o.jpg


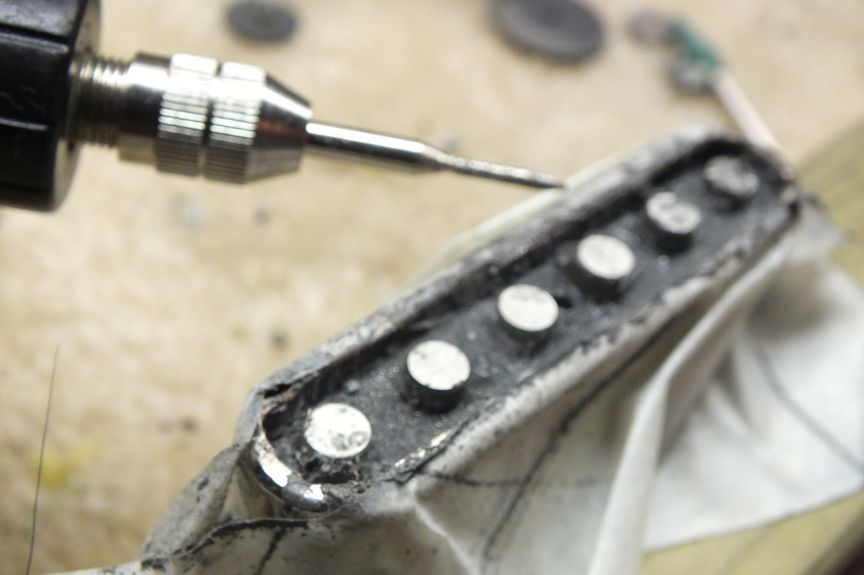
I also dremelled open a tele neck pup for that rarer and open slug hot rod look I love so much

6UiyGJcc_o.jpg


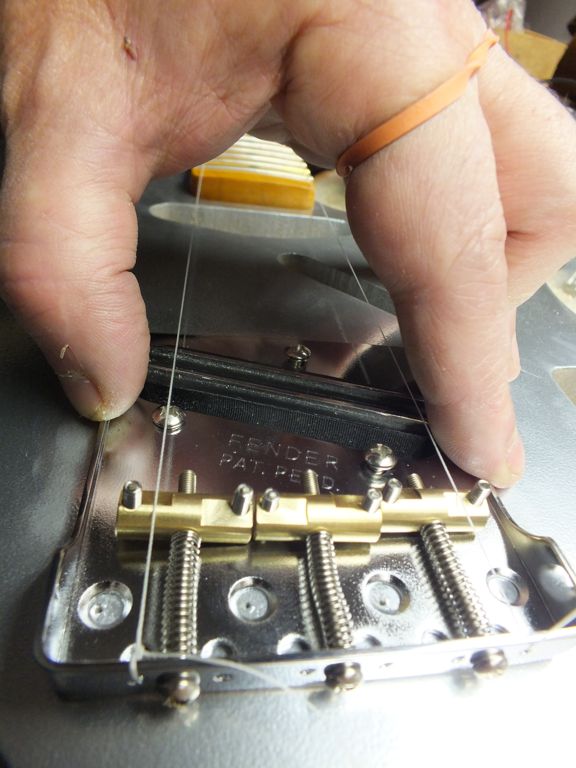
Doing what I wanted to do required me to pretty much line up all the hardware and bridge before actually finishing so I could figure out exactly where I could place the crystal gems and where I could not.

ZdJ55VlX_o.jpg


I then printed out some paisleys and planned out the overall pattern. Changed a bit in the end but this was an extremely helpful step.

6vRGLnqY_o.jpg


At first, I tried various ways to handle the gems. They'd stick to my fingers, even just breathing hard would move 'em around. They were all over the damn place :cuss. It seemed impossible to get anywhere with my fat old fingers in the way.

Tried various different glues, but it took me about six months to finally figure out using clear UV activated resin was the way to do this proper.

I finally figured out using a splinter of a popsicle stick and a damp sponge allowed me very precise placement control gem-by-gem. Put some resin down, plop the gems on top, arrange, smack 'em with the ultraviolet light, repeat.

It affords a fellow plenty enough working time to position the gems, then you hit each small section for a couple minutes with the UV. It's very strong. I know this because I had to remove a couple small sections to redo them! Not that easy. Plus they all lock to each other in the end. Super secure.

I did have to smear a thin coat of silver sparkle glue all over my beautiful silver top to give the surface some "tooth" for the gems and the resin to be able to stick to.

dcKaMxnu_o.jpg


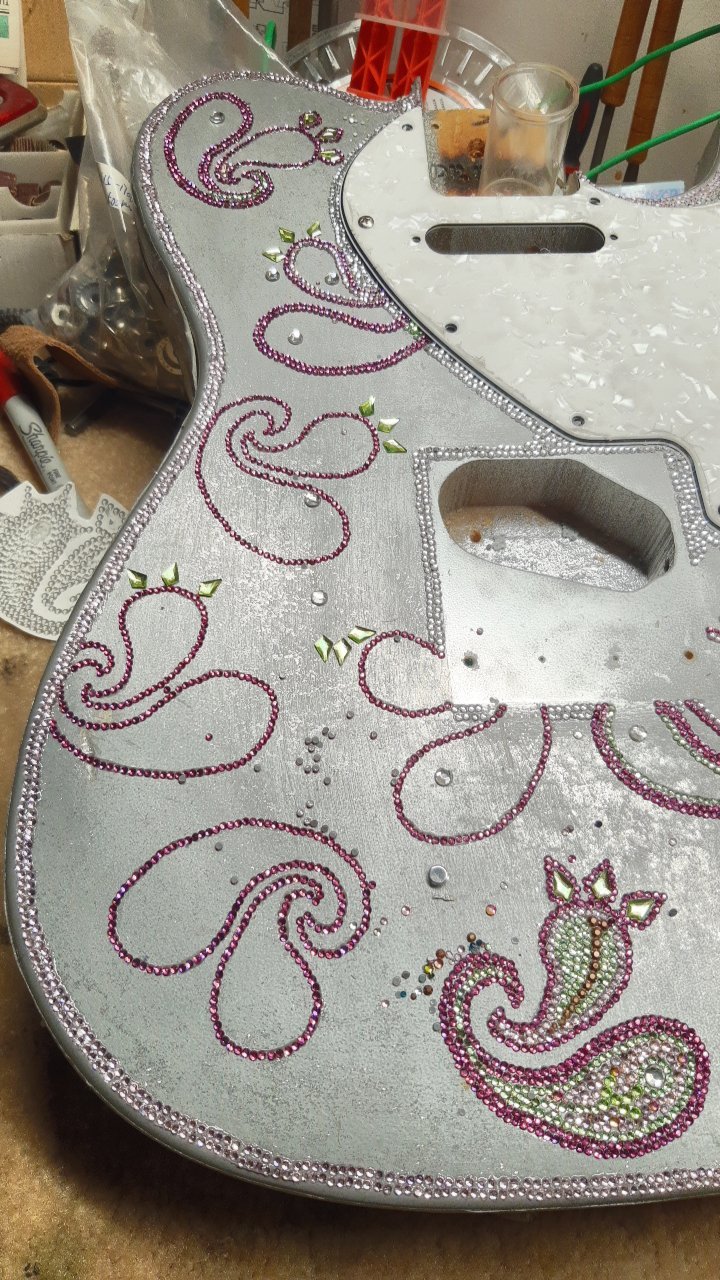
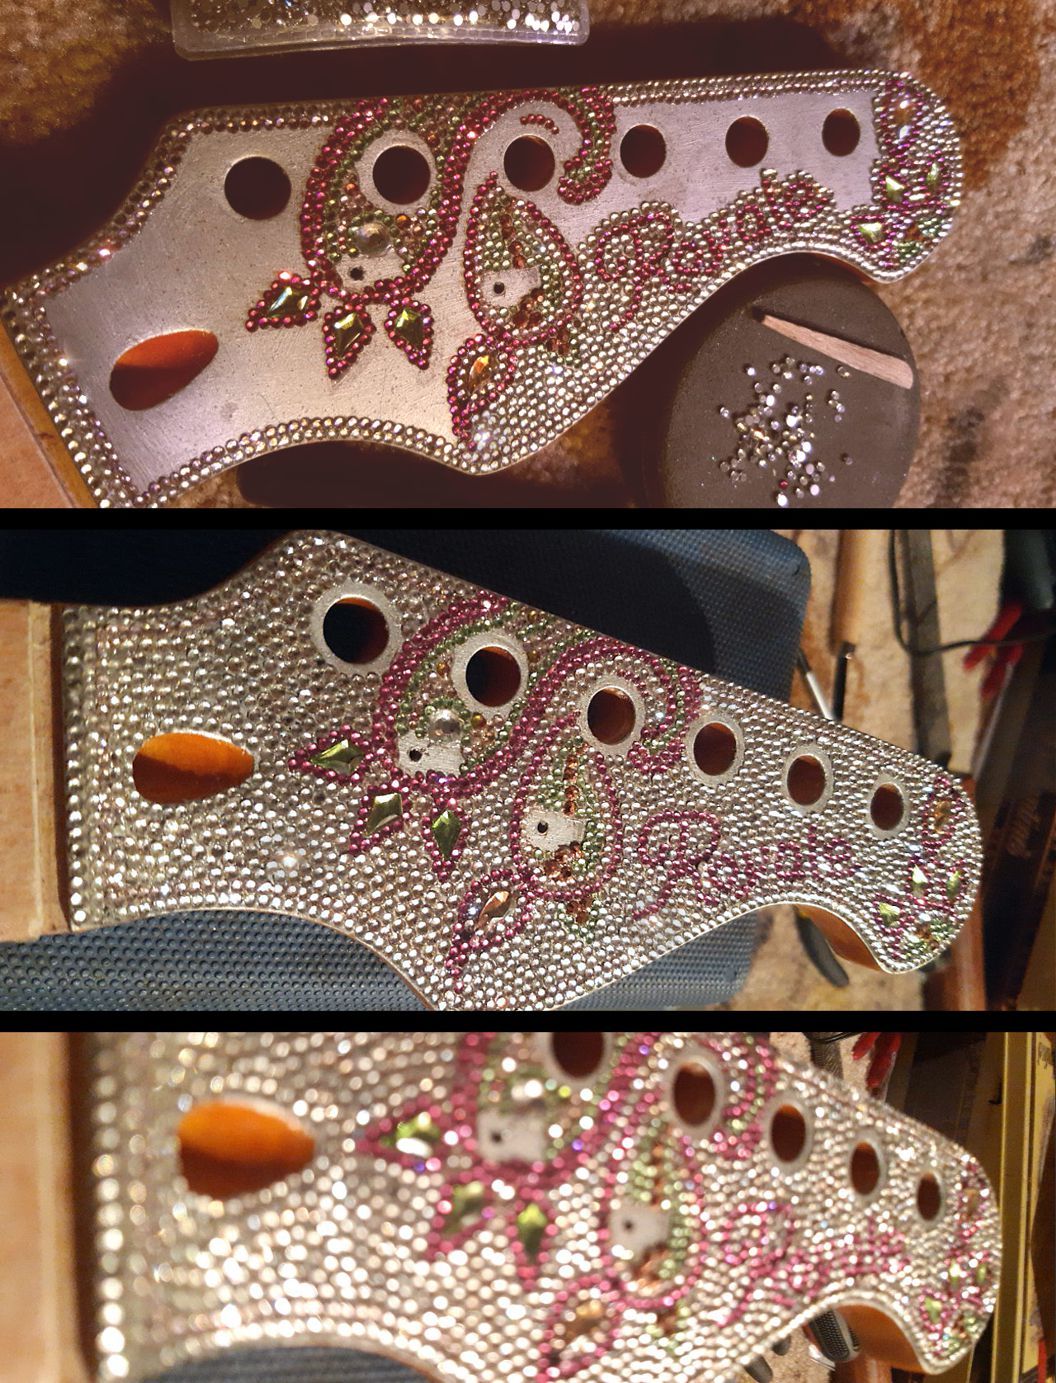
To address the issue of getting the gems into a repeatable pattern, I cut a small plastic frame of the shapes, which I used to form the outlines of the paisley butas, then infilled in my decided-upon pattern and colour combo.

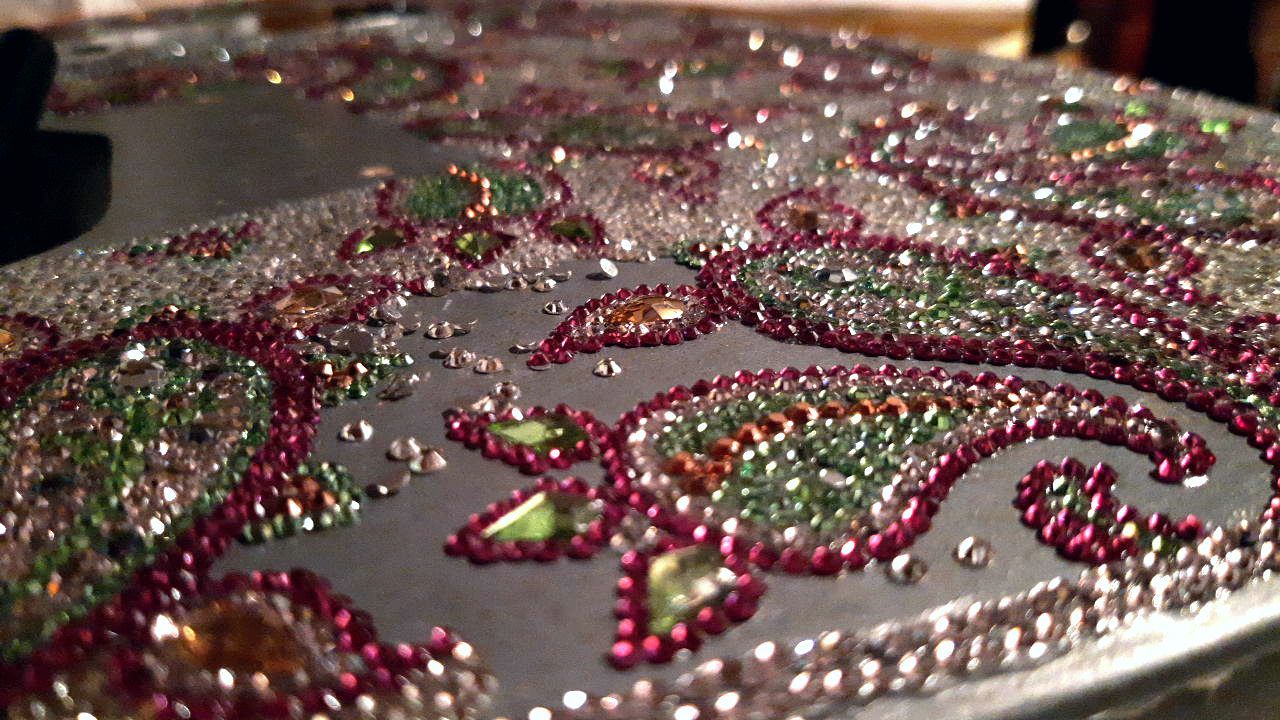
Decided to stay in the traditional pink paisley realm with hints of green, pink, magenta and small brassy gems, and all those white gems in the background.

The main trick is, get your outside border rows done... be extra careful with that. Then, outline all your hardware, and fill.

Next time I do this, I will dremel down the outside edge just a bit so the first two outside rows are down flush with wood. They are secure now, with extra UV glue to sort of smooth it, but the outside edge ridge is not quite as pretty as it could be. Live and learn.

9tPupHJq_o.jpg


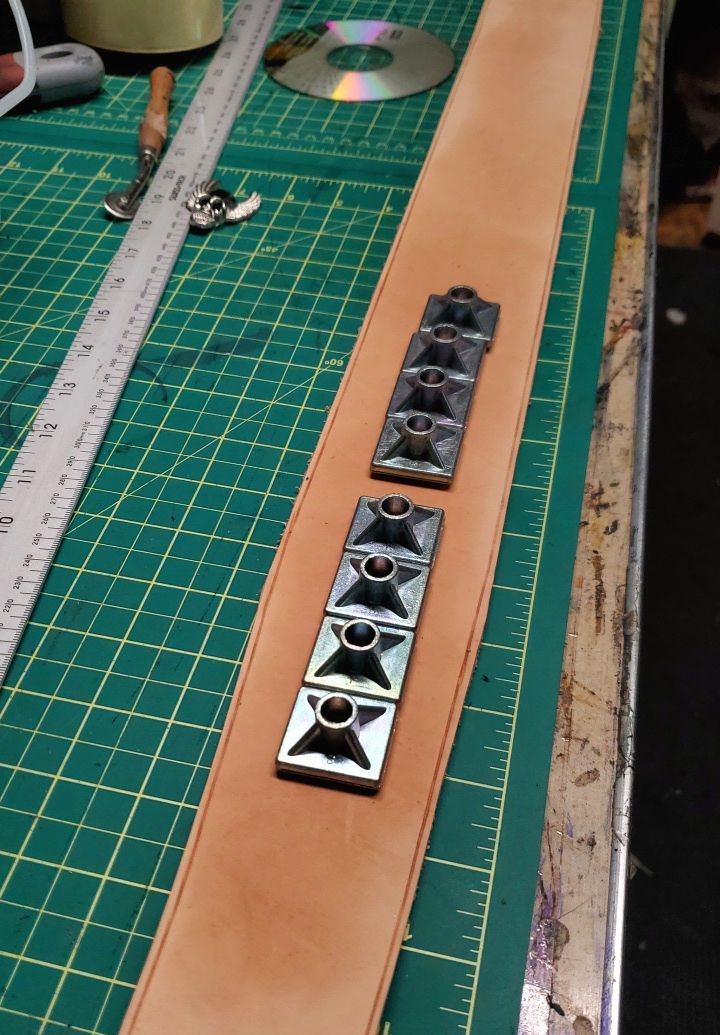
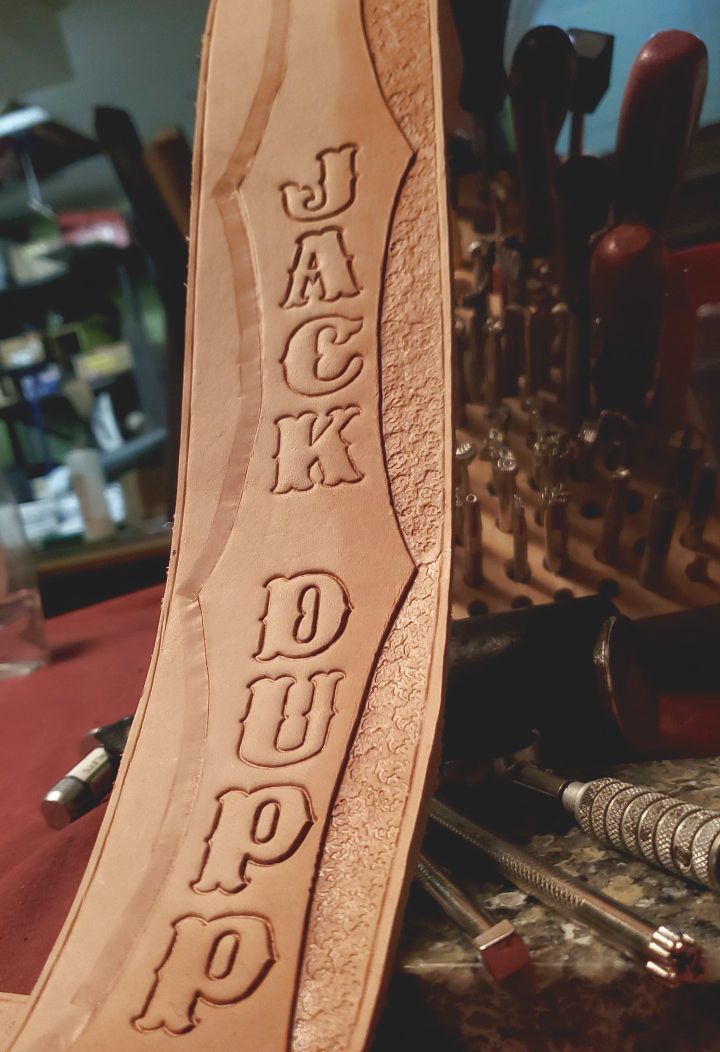
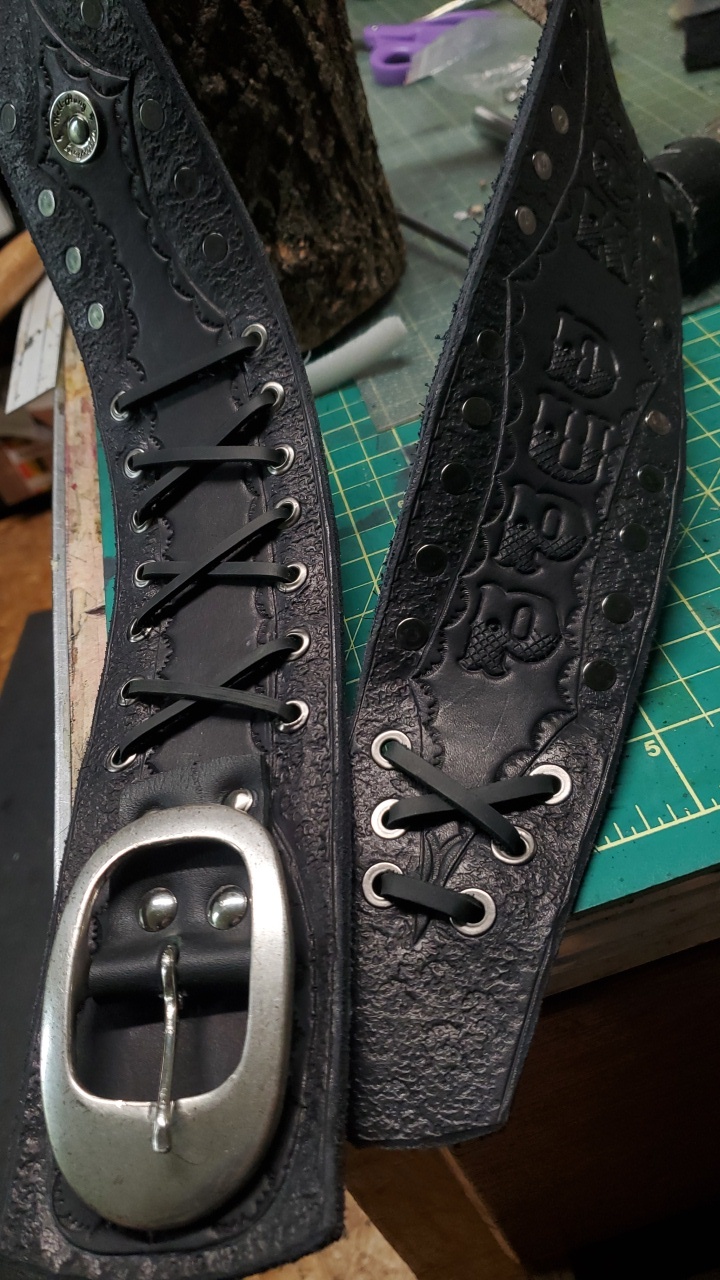
in late 2019 Covid hit us all, and I got laid off my regular job. I suddenly had more time to work on this than I wanted. I made the decision to go hard at strapmaking at that time also. What was I gonna do? Watch Netflix?

I could actually only work on this top for a beer or two a time or so. My old eyes would go totally buggy as I was also using magnifying craft glasses to do it right. I could usually get about one paisley pair done a session I think less than that actually

PIaV5o1y_o.jpg


Then filling the spaces. I figure 50 or 60 hours to place all these tiny frickers.

pPD5Qzfk_o.jpg


Underestimated how many white gems I needed so work stopped for a couple months so I could acquire more.

RSdac0A8_o.jpg


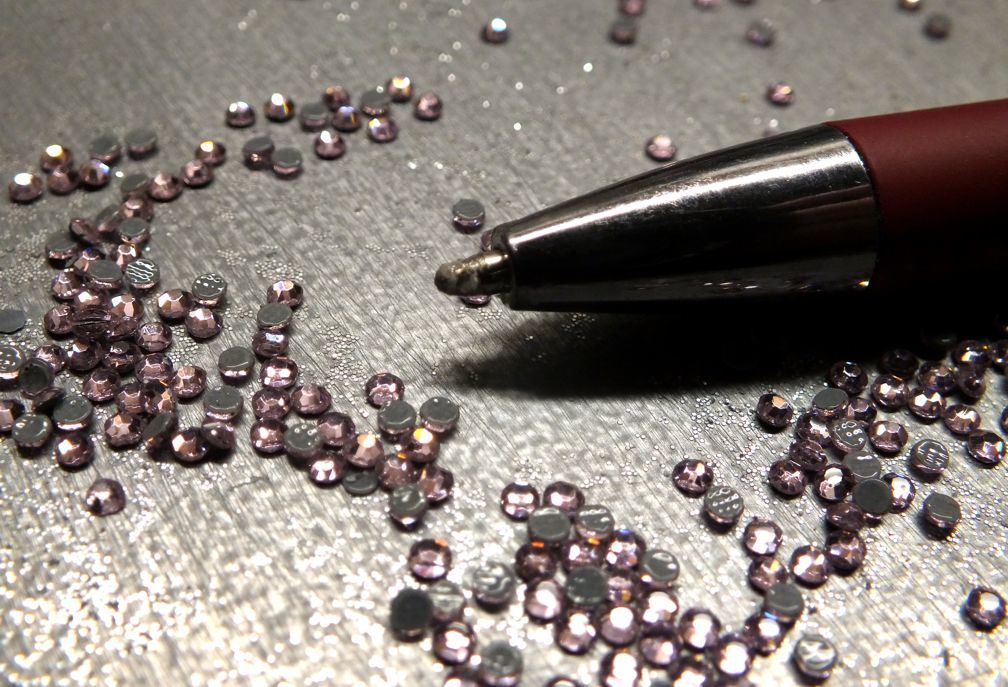
These are flat-backed crystal gems commonly used in the ladies fingernail decorating industry. They come in every colour you can imagine and a bunch of different sizes too.
But, I've refinished several guitars and I can tell you the cost of 30,000 of these gems is less expensive than 6 rattle cans LOL! But, obviously a bit more time consuming to properly apply.

XeVZ1qgd_o.jpg


Once the top and headstock were done... I gave into my sudden deep urge to carve in a tummy cut. Should have done it first off, but hindsight is 20/20. I now wish I would have done an arm bevel too, all you tele purists be damned!

So, one nice sunny day just I had at 'er


To be continued...
 
Last edited:
Back
Top